I wore the first cooling garment on a walk during a Fourth of July parade in a park. It was a hot day. After wearing version 1 for a few hours I learned some lessons.
- Water leaks.
- Vinyl tubing becomes stiff when cold.
- Flexible bladders are hard to seal with glue.
- Submerged pumps are harder to access.
- Cold water in humid air collects moisture.
- It was hard to route the hose.
I wanted to put some of the lessons into practice when designing my next cooling garment prototype. So the next version was quite different from the first.
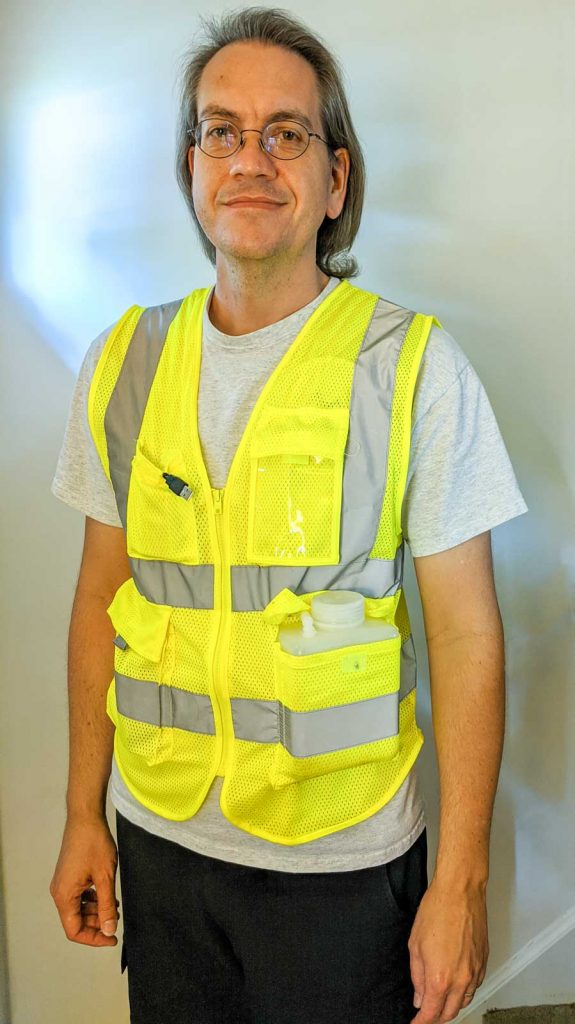
The first thing to go was the backpack. It was too difficult to route the host through cloth layers. I didn’t like picking out seams to make holes. I wanted a frame I could sew the hose on to. I went looking for a mesh vest.
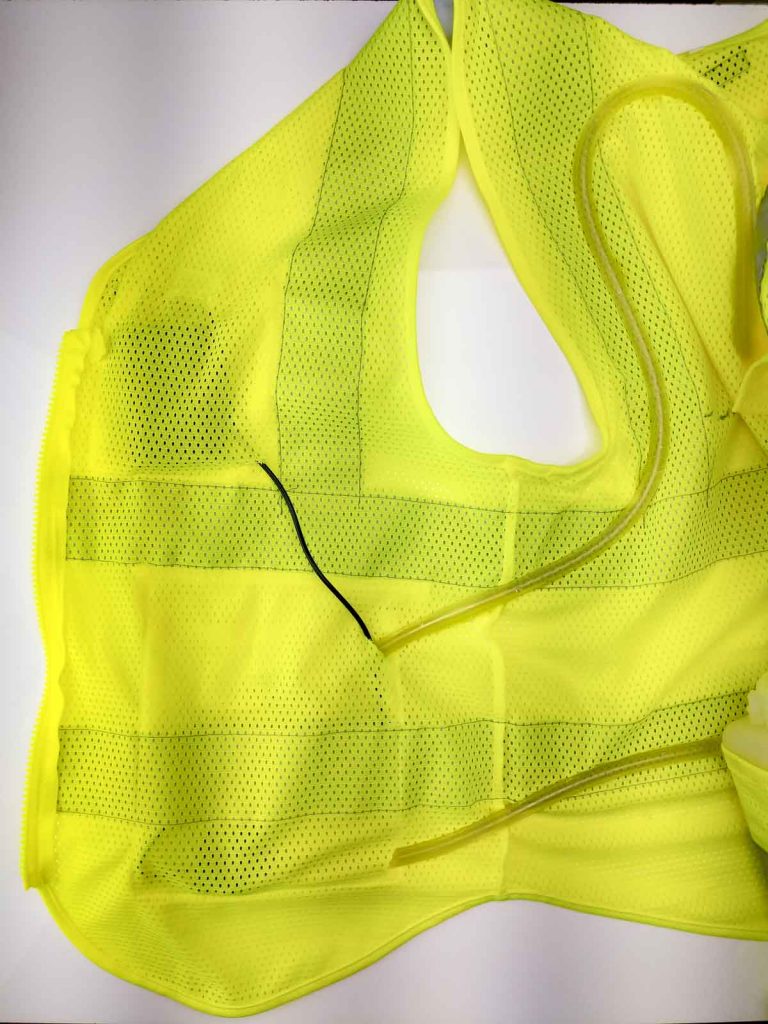
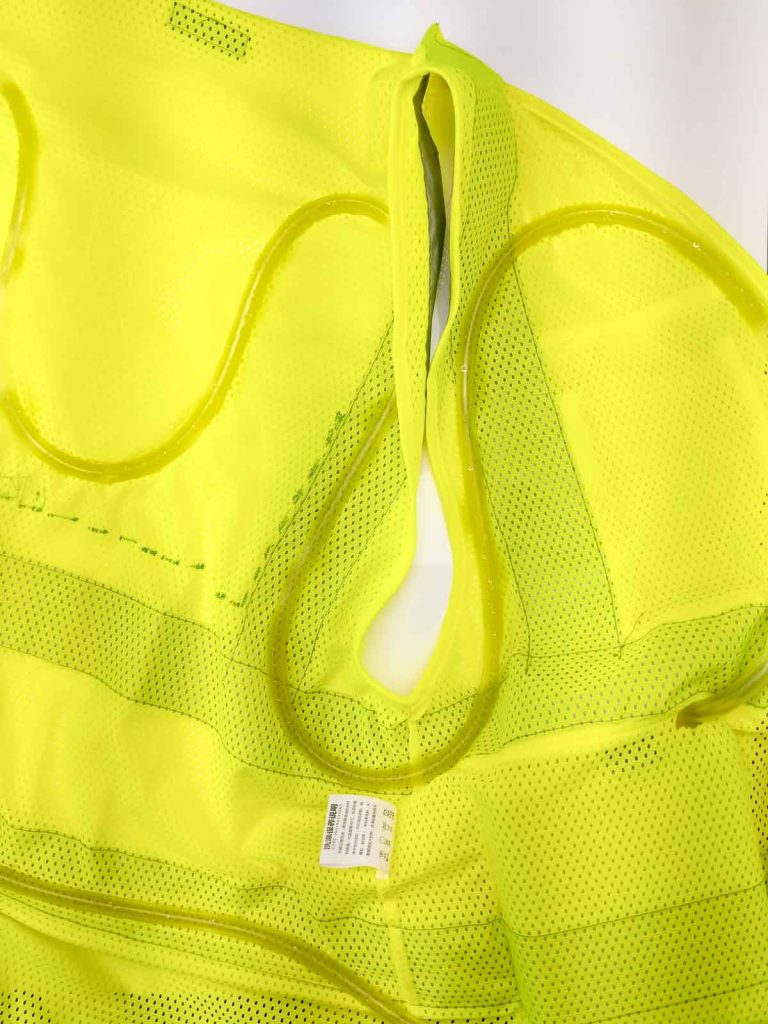
The mesh vest had several advantages. First, air flows through it. This could help with cooling and evaporation. Second, the holes in the mesh would allow easy sewing. Third, a fitted vest would hold the hose close to my body. I found a thin monofilament fishing line worked well for securing the hose to the vest.
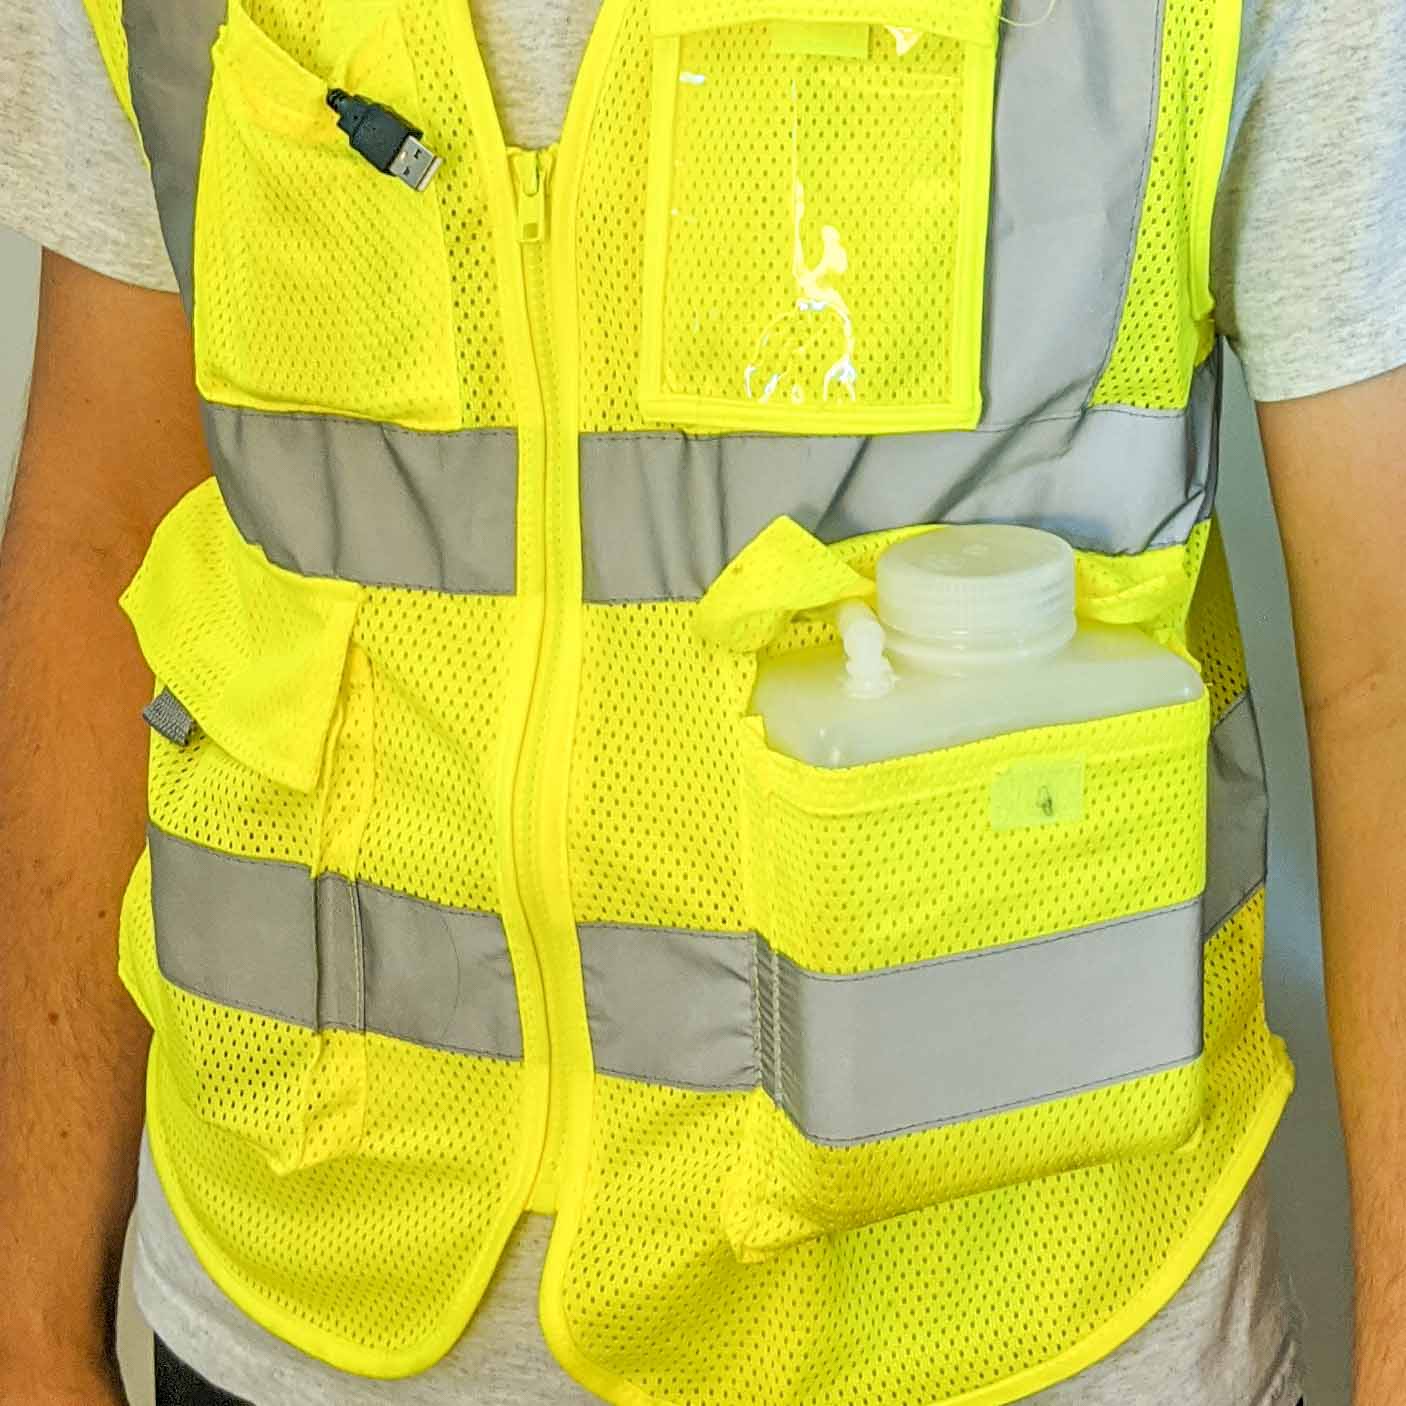
I decided a rigid vessel to hold ice and water would be easier to seal. I purchased a Nalgene bottle with a wide mouth. I also purchased 10 feet of silicone tubing and right angle couplings. I drilled holes in the top and bottom of the bottle and glued in the couplings. Water flowed out the bottom and in through the top. The wide screw top lid allowed ice to be added.
I knew I wanted the pump to be outside the bottle. This would leave more room for ice. The addition of the couplers meant that I could add and remove the hose and replace the pump too. The downside of an external pump is the need to prime the pump with liquid before running. The liquid cools and lubricates the pump. The easiest way to do this would be to mount the pump lower than the bottle.
I wanted to balance the weight across both side of the vest, as much as I could. So I ran hose from the left pocket and the bottle to the right pocket and into the pump. The pump runs on 5v from a USB connection. For this application, I used a USB power bank to run the pump. I ran the cable from the bottom pocket to the top pocket where the bank fits.
Choosing how to route the hose around the vest could have gone better. I needed a mannequin, or another large human model. I wanted the fit of the vest and the weight of the components to hold the hose against my body. I found three places that would work: pectorals, shoulder blades, and lower back. I asked my assistant to draw on the back while I wore it. I wound the 10′ of silicone hose around the back, securing it with fishing line. More hose would allow more coverage.
There’s not too much I can do about condensation. Move to the desert would be one solution. My t-shirt gets lines of dampness from the condensation on the cold hose. It does feel good anyway. I’m already planning version 3. It will be based on forced air ventilation. The moving air should help with evaporation and cooling.